Tag Archives: healthy

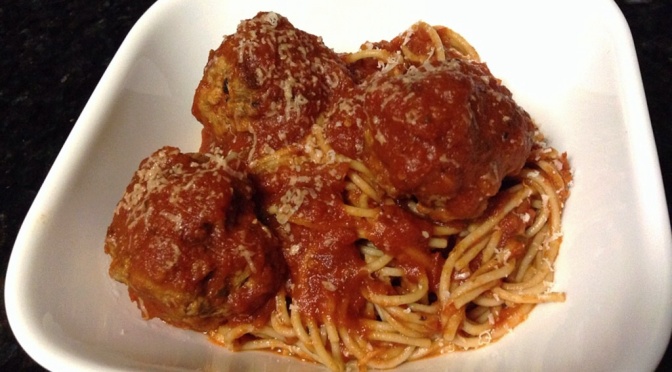
Healthy Spaghetti and Meatballs

I know, another Italian recipe…I can’t help it I LOVE Italian food, it’s just so comforting! Plus these meatballs are healthier and are bursting with FLAVOR! They are perfect on a bed of spaghetti or even on a meatball sub, I’ll take it however I can get ;).

2 Servings of Whole Wheat Spaghetti

1 Pound Lean Ground Meat

1 Pound Turkey Sausage (Sweet or Spicy)

1 Tbs Garlic Powder

1 Tbs Onion Powder

1 Tbs Smoked Paprika

1/2 Tbs Italian Seasoning

1 1/2 Tbs Worcestershire Sauce

1/2 Tbs Salt

1/2 Tbs Pepper

image

Cook the pasta according to the package instructions. In the meantime mix the rest of the ingredients for the meatballs in a large mixing bowl. I believe the key to a perfect meatball is to marry two different kids of meat together along with the perfect blend of seasoning (it’s a match made in FLAVOR heaven!) I love to adjust the seasoning, so use more or less of what you like. The turkey sausage I use comes in a casing, so I just slice it open and remove it from the casing, very easy! Now it’s time to roll them into balls. I like to make them bite size, but you can make them as little or BIG as you want :).

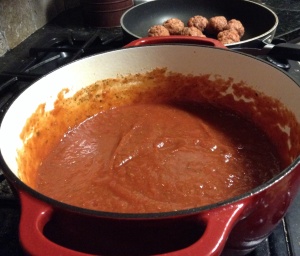
Next brown the meatballs in two batches in a large skillet with a few drizzles of oil. In the meantime, heat up the sauce in a dutch oven or large pot over low heat. (Try my homemade tomato sauce recipe also listed on my blog 😉 ) Once the meatballs are browned place them in the warm sauce, it’s a meatball hot tub! Cover and let cook for about 15 minutes until cooked all the way through. This will make them so moist and delicious…my mouth is already watering!

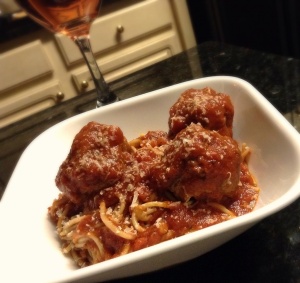
Now they are ready to serve on a nice bed of spaghetti, how delicious does that look! It goes perfectly with a nice glass of wine…ahh now that’s comforting!

Happy Flavoring!

image

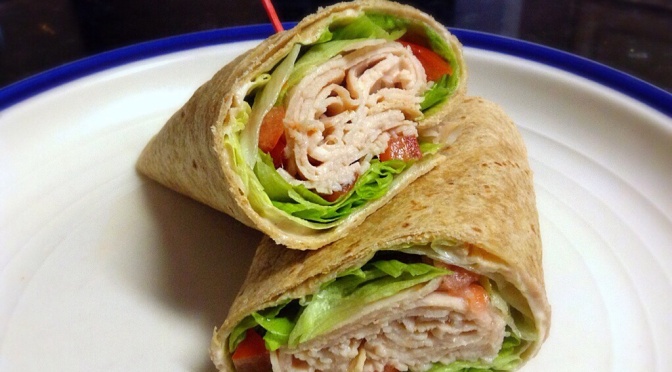
Easy Turkey Snack Wrap

This wrap is perfect for a quick lunch or snack. It’s low calorie but so delicious, I love how satisfying it is. Just take all of your favorite FLAVORS and wrap it up! Go on, sing a little song, I bet you didn’t know you were such a good wrapper, did you. 😉

1 Medium Whole Wheat Tortilla

3 – 4 Slices Low Sodium Deli Turkey

3 Lettuce Leaves

1 Chopped Tomato

Sauce

1/4 Cup Greek Yogurt

1 tsp Sriracha or Hot Sauce

1 tsp Garlic Powder

1 tsp Old Bay Seasoning

1/2 Lime (Juices)

Take the tortilla and spread on the sauce. I love this sauce on everything, and it’s much healthier than mayo. Next lay out the lettuce leaves on top of the sauce. Chop the tomato into a small dice and sprinkle on the wrap. Finally top with the turkey slices, add a little more sauce if you’d like. Wrap it up just like a burrito. Place the wrap in the fridge for 20-40 minutes. Once its ready, slice in half and enjoy.

So easy and so healthy, now that’s a wrap! 🙂

Happy Flavoring!

Peanut Butter Oatmeal Chocolate Chip Cookies

This is such a great cookie recipe…no flour, no butter, and SO much FLAVOR!! This has become my husband’s all time favorite cookie recipe. It has the best of everything; peanut butter, oatmeal, and chocolate chips all in one cookie. It’s hard to believe its a much healthier version of the most ultimate cookie ever! Drum roll please…

1 1/3 Cups Old Fashioned Rolled Oats

2 Cups Crunchy Peanut Butter

3/4 Cup of Brown Sugar

1 Tbs Baking Soda

2 Eggs

1 Tbs Cinnamon

1 Cup Dark Chocolate Chips

Beat the eggs in a large mixing bowl. Mix in the brown sugar and peanut butter. I like to use all natural crunchy peanut butter, but feel free to use whatever kind you like, just make sure it is at room temperature. Add the cinnamon, baking soda, and oats; mix together. Next fold in the chocolate chips. It’s that easy! Chill the cookie mixture for 30 minutes. It’s ok to snack on some chocolate chips in the meantime, at least that’s what I tell myself! 🙂

Preheat the oven to 350°. Line two baking sheets with non-stick foil or parchment paper. Place a spoonful of the cookie dough about an inch apart until both sheets are filled, I like to use my handy-dandy medium-sized scoop ;). Take the back of a spoon and slightly press down each cookie. Bake for 10 minutes (swap the bottom and top cookie sheets half way through to ensure even baking). Take them out of the oven. The cookies will look under baked, but trust me they aren’t! Let the cookies cool for 10 minutes (I know this is the hardest part, it smells so good…I’m so impatient!), then transfer to a cookie rack to cool completely.

Time to dig in! Serve and enjoy, they will not last long!

Happy Flavoring!

image


Roasted Red Pepper Chicken

It’s date night!! This recipe is perfect for impressing your sweety, but it is also easy enough for a casual weeknight dinner. I love to make this recipe on special occasions though, like date night…and no need to go to a fancy restaurant. My husband thinks I spent hours making it (which I let him believe, it makes him love it even more). So get dressed up hubby, dinner is my treat tonight!

3 Boneless Skinless Chicken Breasts

1 Red Bell Pepper

12 Spinach Leaves

12 Slices of Fresh Mozzarella Cheese

4 Slices of Wheat Bread

1/2 Cup Greek Yogurt

2 Tbs Garlic Powder

2 Tbs Italian Seasoning

1/2 Tbs Salt

1/2 Tbs Pepper

1 Tbs Canola Oil

First we need to make the breadcrumbs. If you prefer you can use store bought, but I love making my own…it’s so easy and you can add your own FLAVOR! Preheat the oven to 425°. Cut the bread into quarters and drizzle both sides with canola oil and half of the garlic powder and Italian seasoning. Place on a baking sheet lined with foil.  Bake for about 10 minutes, flip halfway through. I love smelling the seasoning as it starts to cook, it smells amazing! Once the bread has cooled, place in a food processor and pulse until it becomes fine breadcrumbs. Pour onto a plate and put aside.

Next trim the top off of the red pepper and cut in half. Empty the pulp and seeds from the inside. Place on a baking sheet and drizzle with canola oil. Roast for 20 minutes until the pepper is blistered, flip halfway through. Trust me, if you have never tried roasting a pepper it is so worth it. It enhances the FLAVOR tremendously. Once it’s done, place in a bowl and cover with plastic wrap for 10 minutes. This will steam the pepper so you can remove the skin. Carefully peel off the skin, but do not run under water, it will rinse off all of the FLAVOR (you don’t want all that hard work to go right down the drain). It should peel right off, don’t worry about getting off every little bit.  Cut into medium sized pieces.

Drop the oven temperature to 400°. Take the chicken and trim off any fat. Then cut the chicken into two pieces by placing your hand on top of the chicken and carefully slice the middle from top to bottom. If it is easier, you can pound the chicken instead. Just place in between plastic wrap and pound until thin (I have to admit this way is more fun, it gets out all that aggression).

Line a baking sheet with foil. I like to place a cookie cooling rack on top of the pan to lay the chicken on. This will let the heat circulate around the chicken and prevent the bottom from getting soggy (no one likes a soggy bottom 😉 ). Season both sides of chicken with the rest of the seasoning. Then brush both sides with Greek yogurt and dip into the breadcrumbs. Place each piece of chicken on the cooling rack. Bake for 20 minutes.

image

In the meantime cut the mozzarella into thin slices. Once the chicken is ready, pull the pan out of the oven and place a few spinach leaves on top of each piece of chicken. Then place a piece or two of red pepper and top with the mozzarella cheese. Place under the broiler for 5-8 minutes until the cheese is melted. Keep a close eye on it, they go very fast! Let cool and serve.

Happy Flavoring!


Light Spinach Artichoke Dip

Time to throw away that tired old spinach artichoke dip recipe, and spruce it up with this revamped dip. By making a few swap outs, this recipe is much healthier without losing any of the FLAVOR. My husband was so surprised when I told him that I changed it up after he tried it (I’m so sneaky). I actually surprised myself when I created this recipe (trust me you will be amazed after the first bite). Such a delicious dip without any of the guilt…count me in!

2  14 oz. Cans of Artichokes

1  10 oz Bag of Fresh Spinach

1  15 oz. Container of Ricotta Cheese

1/2 Cup Greek Yogurt

1 Cup Shredded Mozzarella

2 Tbs Canola Oil

1/2 Tbs Nutmeg

2 Tbs Garlic Powder

1/2 Tbs Cayenne (optional)

1/2 Tbs Salt

Preheat the oven to 365°. I love using fresh greens so I use fresh spinach, but you can use frozen if you’d prefer. Add the canola oil to a large skillet and add the fresh spinach. If your skillet is not big enough, just add a little at a time. It will look like a lot, but it will all wilt down (it’s so crazy how you start with a big bag of spinach and it cooks down to about a cup, I guess that is the magic of it). Add the nutmeg and half of the garlic powder. The nutmeg is a perfect seasoning to add to greens. It really enhances their FLAVOR! Add more oil as needed. Once they have finished cooking put aside.

Drain the artichokes into a strainer and rinse them with water (this will rinse off the salty brine that they are packed with). Squeeze out the water of each artichoke and place on your cutting board. Cut the artichokes into a rough chop (watch those fingers!)

Time to put it all together (here is where we add the secret ingredients 😉 ). In a large bowl combine the artichokes, ricotta cheese, and Greek yogurt. Mix together, then add in the rest of the seasoning along with the spinach mixture and half of the mozzarella.  Spread into a greased casserole dish and top with the remaining  mozzarella cheese. Cook for 30-35 minutes until lightly browned. Serve once it has cooled for 5-10 minutes. This dip goes great with tortilla chips, crackers, or pita chips.

Try out his recipe for your family or at your next dinner party, then you can tell them how healthy it really is, or you can keep it our little secret (don’t worry, I won’t tell 😉 ).

Happy Flavoring!

Roasted Cauliflower

This a perfect side to add to any dinner. If you think you don’t like cauliflower, you need to try this recipe. It’s so delicious, it will change your mind. My husband thought I was crazy when I told him how good it was, and now he actually requests it. (He should know by now that I’m always right 😉 ). This is one of those recipes that I was very surprised by, and made my own twist to.

1 Head of Cauliflower

1 Tbs Garlic Powder

1 Tbs Onion Powder

1/2 Tbs Smoked Paprika

1/4 Tbs Salt

1/4 Tbs Pepper

1 Tbs Canola Oil (or Olive Oil)

Preheat oven to 425°. Cut off the  green leaves and middle stalk from the bottom of the cauliflower and discard. Cut into medium size pieces and place on a baking sheet. Drizzle with oil, and season both sides (sprinkle with all that lovin’). Cook for 20 minutes, flip halfway through.

Remove from the oven and let cool for 5 minutes. I’m telling you, you’ll be surprised (I never knew I would be convincing someone to try cauliflower…so crazy but so good)! Now eat your veggies and enjoy (what a crazy concept)!

Happy Flavoring!

Guiltless Chocolate Brownies

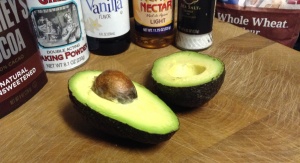
Ok guys, I know what your thinking. How can I write a blog without including a recipe for my all time favorite dessert…my beloved brownies! This is a healthy recipe so you can have your cake and eat it too…well brownies in this case. The avocados make the chocolate so creamy (it’s a match made in chocolate heaven). My husband was skeptical of these brownies at first, but he was surprised at how delicious they turned out (how dare him for ever doubting me). What got him was the chocolate gooey center, I knew it would!

image

2 Ripe Avocados

1 Cup Agave Nectar

1 Tbs Vanilla Extract

2 Eggs

1 Cup Whole Wheat Flour

1/3 Cup Unsweetened Cocoa Powder

1/4 Tsp Salt

1/4 Tbs Baking Powder

Dark Chocolate Candies (9-12 squares)

Preheat the oven to 350°. Mash the avocados in a large mixing bowl until smooth. Next add the eggs, vanilla extract, and Agave to the bowl and mix delicately by hand. I love using Agave since it is a natural sweetener. If you like it extra sweet (I know you’re out there), try melting some dark chocolate and pour some directly into the batter.

In a separate bowl, add the dry ingredients: whole wheat flour, cocoa powder, salt and baking powder.  Add to the wet ingredients and gently stir until combined, do not over mix. Pour into a greased baking dish (I like using a 9×9 square glass dish). Spread evenly.

Now the best part, take the dark chocolate pieces and push into the batter (I used 9 dove dark chocolate squares). Take the back of a spoon and cover the chocolates with the batter. This is what makes the yummy gooey middle (my favorite part), it’s the hidden FLAVOR. Bake for 25 minutes (no toothpick needed) and let cool.

Now it’s time to enjoy…ahhh my favorite dessert without any of the guilt. Just look at that gooey center and try to resist!

Happy Flavoring!
 

image

Suzie’s Stew

It’s stew time!! Don’t you just love those one pot meals that you let cook all day. It smells so good and let’s you know what’s coming for dinner. I love the way it makes my whole house smell (it’s like a stew air freshener….hey, I’d buy it).

2-3 Pounds Beef Round or Chuck

5 Red Potatoes

1 Large Onion

1  Pound of Baby Carrots

2 Cups of Red Wine

2 Cups of Low Sodium Beef Stock (or chicken stock)

Water (to fill the rest of the pot)

2 Tbs of Canola Oil

2 Tbs of Smoked Paprika

2 Tbs of Onion Powder

2 Tbs Garlic Powder

1 Tbs Italian Seasoning

1 Tbs Cayenne (optional)

1 Tbs Salt

1 Tbs Pepper

This is a perfect meal to make in a dutch oven or crockpot and it feeds a crowd (or just me and my hubby…can you say leftovers…yay!) This stew also reheats so easily the next day, and lasts for a few days in the fridge.

First chop all of the veggies into large pieces and put aside. Next chop the meat into medium size cubes. You need a strong arm for this (it’s how I get my arm exercises for the day), you can ask your butcher to do this for you if you would like. Then season the meat liberally on both sides (Make It Rain!…don’t be skimpy)!

Drizzle canola oil into the pot and heat up to high. Toss the meat into the pot for just a few minutes to get the outside nice and brown. I usually brown them in two separate batches. Take the meat out of the pot and add in the veggies. Brown them also for a few minutes. Then add in the wine (some in the pot and some in my mouth…yes please!) Here is where you can scrape the bottom of the pot with a wooden spoon to release all of those bits of FLAVOR. Return the meat back to the pot. Let it go for a few minutes then add in the stock. Fill the rest with water till it reaches the top of the mixture. Once it comes to a boil lower the heat to low and let simmer for 1 1/2 – 2 hours. Take a peak here and there to see if you need to add a little more water.

Now it’s time to just sit back and enjoy that delicious aroma (my favorite part). Once it’s ready, serve in a bowl with some crackers. It goes great with a glass of wine (also my favorite part 😉 ).

Happy Flavoring!

Strawberry Raspberry Smoothie

I have a confession to make, I’m just gonna come right out and say it…I Love Soy Milk!! Ok, I feel so much better now that I got that off my chest.  I think it tastes so much better and sweeter than regular milk…talk about FLAVOR!

1 1/2 Cup Silk Original Soy Milk

1 Cup Frozen Strawberries and Raspberries

1/2 Tbs of Agave or Honey (optional)

If you’re like me, sometimes a fruity and healthy smoothie really hits the spot.  They are perfect for breakfast, snacks, or even an after dinner dessert.

The key is to chop your fruit into medium sized pieces as soon as you bring them home from the store. Toss them into a ziplock bag and store in your freezer. (I love the convenience of grabbing it out whenever I have a smoothie craving, which for me is a lot!) Use different fruits and make your own combinations. I also like peaches with a dash of cinnamon or nutmeg for breakfast (I like to trick my mind into thinking I’m having a slice of peach pie for breakfast 😉 ).

Take the fruit and soy milk and blend in a high power blender. And viola, a delicious and healthy smoothie (without all of the added sugar).

Happy Flavoring!
 

Healthy Fish Tacos

My husband loves Mexican food, so anytime I come up with a recipe that involves a tortilla and the word “Taco”, he’s in!

image
Thumbs up from hubby!

The part that he does not need to know is how healthy it really is. Customize your taco by adding the perfect amount of toppings.

1 Fillet of Cod (or your choice of any white fish)

1 Tbs Old Bay Seasoning

1/2 Tbs Cayenne Pepper

Whole Wheat Tortillas

Tomato

Pickled Jalapenos

Onion

Italian Seasoning

Cabbage


Sauce

1 Cup of Greek Yogurt

2 Tbs of Light Mayo

2 Tbs Sriracha

1/2 Lime (juice)

1 Tbs of Garlic Powder

1 Tbs Old Bay Seasoning

1/2 tsp Smoked Paprika

First mix all of the ingredients for the sauce in a bowl and pop it in the fridge. I like to store it in a squeeze bottle (which makes it easy to drizzle over whatever you want). Next its time to cook the fish. Season the fish with Old Bay seasoning and cayenne pepper (leave out the cayenne pepper if you don’t want it spicy, but my husband and I are definitely a spicy couple 😉 ). Lay on a baking sheet lined with foil.  Place in the oven on broil for 10 to 15 minutes until browned.  It will brown the fish perfectly, so FLAVORFUL!  (This is usually around the time hubby asks…is it ready yet?!)

While the fish is cooking, its pico de gallo time! Chop the tomato, jalapeños, and onion into a small bowl.  I’m not crazy about cilantro, so I sprinkle with Italian season which does the trick for me.

Take the fish out of the oven and shred apart with a fork. Now setup a taco station with all the toppings. It’s a fish fiesta! Perfect for a taco party (get those margaritas ready)! Dinner is served… and hubby is happy! 🙂

Happy Flavoring!


Chicken and Veggie Spaghetti

This recipe is so easy and full of FLAVOR! It’s  perfect for using up all of your leftover veggies at the end of the week.

2 Servings of 100% Whole Wheat Spaghetti

1 Chicken Breast (chopped)

1 Zucchini (chopped)

1/2 Green Bell Pepper (sliced into strips)

1 Cup of Tomato Sauce

1 Tbs Canola Oil

1 Tbs Salt

1 Tbs Pepper

1 Tbs Garlic Powder

1 Tbs Onion Powder

1/2 Tbs Italian Seasoning

1/2 Tbs Cayenne Pepper

Preheat the oven to 425°. Season the chicken on both sides with half of the seasoning. Adjust the FLAVORS of the seasoning according to preference. Place on a baking sheet and cook in the oven for 20 minutes, flip halfway through. (I usually cook a few chicken breasts to save in the freezer for later in the week, it’s a huge timesaver…shh, don’t tell anyone, it’ll be our little secret 😉 ). Insert a digital thermometer to see if the chicken is done, it should read 165°.

In the meantime, boil your pasta according to the box instructions. Chop all of your veggies and toss in a skillet with the other half of the seasoning and the canola oil. (This is the best part, you can use whatever veggies you have on hand…see, Suzie’s here for you to make it easy 😉 ). Turn the heat up high to brown them slightly, then finish cooking on medium low heat until they are cooked through. See that brown coloring…that is where the FLAVOR is…mmmm!

Add the tomato sauce to the veggies. Cube your finished chicken into bite size pieces and toss in with the veggie mixture. Give it a stir, then serve on a bed of cooked pasta. How easy was that?! (Just don’t tell my husband). Dinner is served!

Happy Flavoring!
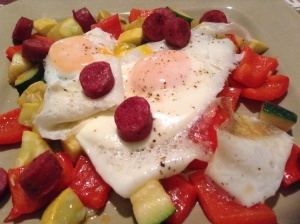
Veggie Hash

My hubby requests this one a lot, so I surprised him with this hash tonight for dinner. I know the way to a man’s heart ;). It is so healthy and full of vegetables. I love it when meals are so good and also so good for you! This recipe has so many options…check out all of the pictures at the bottom!

5 Red Potatoes

1 Medium Onion

1 Red Pepper

1 Zucchini

2 Tbs Canola Oil

1 tsp Salt

1 tsp Pepper

1/2 Tbs Garlic Powder

1/2 Tbs  Onion Powder

1/4 Tbs Cayenne Pepper (optional)

2 Eggs (optional)

Sauce

1/2 Cup Greek Yogurt

1/2 Tbs Garlic Powder

1 tsp of Old Bay seasoning

1/2 Lemon (juice)

1 Tbs Sriracha

Preheat the oven to 425. First we start with the sauce which will be drizzled on top to give this recipe added FLAVOR. Mix all of the ingredients for the sauce in a small mixing bowl. I like to pour it into a condiment squeeze bottle so I can drizzle it on top at the end, it makes it look so fancy ;). Next dice the potatoes and lay them on a baking sheet. Brush them with canola oil and sprinkle with salt and pepper. Sometimes I add some garlic powder also (I love garlic almost as much as my husband, I think he’s starting to get a little jealous). Cook for 20 minutes, flip halfway through.

Next, chop the veggies into medium sized pieces. Heat up the canola oil in a large skillet and add the veggies. Cook over high heat. Sprinkle with seasoning and let them dance (boogie time…it helps to do a little dance yourself). Don’t be afraid to let them brown, that is where all of the FLAVOR is. Once they have browned turn down the heat to medium low and let them finish cooking.

I cook a little scrambled egg for my hubby (cause I know how he likes it…yeah baby). I eliminate the egg for my portion because I’m watching my cholesterol, so adjust to your own dietary needs. Everyone has their own unique FLAVOR.

Time to plate, it’s all about making it look as delicious as it is going to taste. Start by serving the potatoes on the plate, then add the veggies on top. Next top with the egg (or not). Then I drizzle the sauce on my portion. And there you go, what a nutritious and delicious meal. High five to the cook!

Happy Flavoring!

So many options…

imageScrambled Eggs Hash

imageVeggie Hash

imageSausage & Eggs Hash

imageFilet of Cod Hash


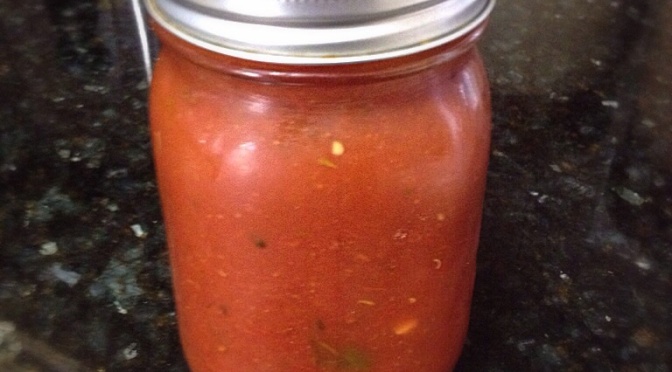
Easy Tomato Sauce

This recipe is so simple and is so much healthier than store bought tomato or marinara sauce. It has way less sodium and no added sugar. Trust me, it makes a difference when you control the ingredients, and the FLAVORS!

1 28 Oz. Can of Crushed Tomatoes

1 Cup of Water

1 Medium Onion (diced)

2 Cloves of Garlic

1/4 Cup of Fresh Basil (rough chopped)

1/4 Tbs of Salt

1/2 Tbs of Italian Seasoning

1 Tbs of Olive Oil (or canola oil)

Warm up the oil in a pot or dutch oven over medium heat (I use my beloved dutch oven which I use all the time, it’s my new best friend…weird I know).  Then chop the onion and add to your pot. Cook for about 5 minutes. In the meantime you can sing that song in that commercial that you just can’t get out of your head ;). Once the onion is translucent, chop and add the garlic to the pot. If you have trouble cutting the sticky garlic use a hand grater (microplane) to grate the garlic right into the pot. It only needs a minute for the garlic to cook, once you start to smell it (oh do I love that smell) it’s done!

Pour in the crushed tomatoes and water and bring to a boil. Start to add in the spices. Tear the basil into small pieces and add into the mixture. Once it starts boiling put on the lid and reduce the heat down to low. Let it cook for 30 minutes, then let cool slightly and it’s ready to use. I like to make double batches and store it in mason jars in the fridge to grab whenever you want. It’s great for a fast pizza or pasta dish, or even drizzled over a English muffin or veggies. Hope you enjoy!

Happy Flavoring!

image

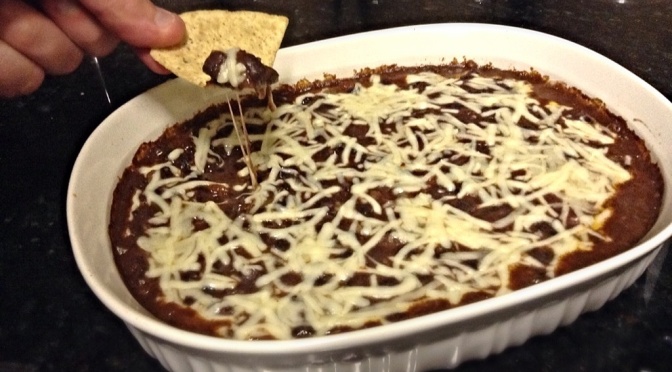
Black Bean Dip

Remember guys, it’s all about the FLAVOR. The spices are key, which will enhance the taste of each ingredient. This is definitely a go to dip for me, so simple and so delicious!

1/2 Cup of Salsa

1/2 Cup of Shredded Mozzarella (optional)

1 Small Onion (diced)

4-8 slices of Pickled Jalapeños

1 Tbs. Cumin

1 Tbs. Garlic Powder

1 tsp. Cayenne Pepper (optional)

1/2 Tbs. Salt

1/2 Tbs. Pepper

Preheat the oven to 375. Pour one of the cans of beans into a pot (beans and liquid). Use a potato masher to mash the beans. Drain and rinse the 2nd can and add to the pot. Chop onion and jalapeños and add to mixture. You can adjust the heat level with how much jalapeños you add, I use a lot because Suzie likes it spicy! Add salsa and spices and stir over medium-low heat for 5 minutes.

Transfer to casserole dish and sprinkle the top with cheese. (Look how pretty, nice snow covered beans….oh this dip would be perfect on a snowy day….ok sorry my mind got away from me, I’m back). Of course if you are vegan, you can totally leave this step out. Cook uncovered for 20 minutes. Let cool and serve with tortilla chips, pita chips or your favorite crackers. Yummy!

Happy Flavoring!