Ok guys, say it with me… I Love Pizza!!! I have some diet restrictions, but don’t think for a second that was going to stop me from having my beloved pizza. So I came up with this pizza recipe. Just by making a few swap outs, this is a much healthier alternative, and so much easier than you think!
2 Cups Whole Wheat Flour (1/4 extra for dusting)
1 Packet of Active Dry Yeast (2 1/2 tsp)
1 Cup Warm Water (around 110°)
1 Tbs Agave Sweetener (or 1 Tbs Sugar)
1/2 Tbs Salt
1 Tbs Garlic Powder
2 Tbs Italian Seasoning
1 Tbs Olive Oil
First we have to activate the yeast (trust me it sounds more scientific than it really is, basically you just need to let it soak in warm water, it’s a yeast bubble bath.) All you do is get your tap water running to about 110° (I like to take my digital thermometer and hold it under the water…I know, I’m so technical). Then measure 1 cup of the water and pour into a small bowl. Add in the yeast packet with 1 Tbs of Agave or sugar and give it a stir (I use agave because it is a natural plant based sweetener which is healthier, but feel free to use whatever you want). Let it sit for 5 minutes (don’t forget to set a timer…trust me I have forgotten to before.)

In the meantime add the flour to a large mixing bowl. Also sprinkle some flour on a flat surface where you can knead out the dough once it is ready, I just use my granite countertop. Add the salt, garlic powder and Italian seasoning into the flour mixture and mix together. This will give so much FLAVOR to the dough by adding spices directly into it. (I bet you’ll smell it once you cook it later). Pour the yeast mixture and olive oil to the bowl. Before we get our hands dirty, now would be a good time to remove those rings (I always have to remind myself of this step). Take a fork and start to pull away at the edges and start to mix in toward the center. Now get your hands in there and start mixing, time to have fun and play with the dough…hey it’s grown up playdough ;).

Transfer to a floured surface and knead for 3 minutes, use the heel of your palms to keep kneading and folding it. Take out some aggression, this is the fun part. (Warning: you may start to feel like Giuseppe from you local pizzeria and feel tempted to toss the dough in the air…trust me, not a good idea ;). )Transfer to a bowl greased with olive oil. Turn over so it coats the dough with the oil and cover with saran wrap. Let it rise for 1 hour (up to 2 hours). Again set a timer! You will see the dough double in size.


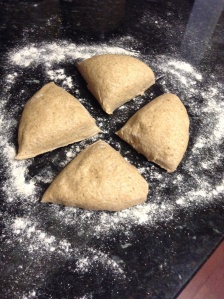
Once it has risen, turn out the dough onto a floured surface. Form into a ball. Next it’s time to use a bench scraper (or knife) to cut the dough into 4 sections. You can cook one right away (which I’m sure you’ll want to, I can’t resist either) but they can be also be stored in the fridge or freezer. If you store them in the freezer, you can transfer them into the fridge one at a time the day you want to use it, it will defrost in 5-6 hours. If you store it in the fridge it will last 3 days.

Preheat the oven to 515° with a pizza stone in the bottom rack of the oven for about 30 minutes. It is so much better to use a pizza stone to make it crisp…trust me, it is so cheap to buy and so worth it, it really makes a difference (I definitely get use out of mine…Friday night pizza parties 🙂 )! Roll out the dough on a floured surface with a rolling pin slowly (don’t forget to dust the rolling pin with flour so the dough doesn’t stick to it). Transfer the rolled out dough to the backside of a baking sheet sprinkled with some whole wheat flour or corn meal (this is what you’ll use to transfer the dough to the pizza stone…I know I’m so creative.)
Now top with sauce, cheese, and toppings. It’s time to have fun with your toppings, go crazy. Check out my easy homemade tomato sauce to use with this recipe in my blog, they go perfectly together. I like to sprinkle the top of the pizza with some Italian seasoning for added FLAVOR. Next lightly brush the edges of the dough with olive oil, this will create that delicious crispy crust. Slide onto the pizza stone with a large spatula and cook for 7 minutes on the bottom rack of the oven until brown and crispy, rotate half way through. Pull out and let cool. Cut and serve, It’s pizza time!
Happy Flavoring!


